First a primer on circular expansion. Sometimes it is needed to get a circular bottom for dice bags and similar, or an evenly distributed top for a coif. And besides weaving halfways round or hexagonal flat patches (sometimes even using Japanese sheet weaves), and then stitching them to the 'vertical wall' sheets, there is also the possibility to weave European 4in1 (and other Euro-Sheet weaves), to have a circular form, AND an Euro border, so a seamless transition to the walls can be made. This shall be shown here.
Experiments of many maillers showed, that an increase of ring numbers of six added rings per successive ring row results in a flat sheet; if a higher number were used, this makes the sheet NOT flatter (there is no flatter than flat in Euclidian geometry), but decreases only the average distance of neighboring rings of one ring row. But if less rings per ring row are added, the expansion is less experienced, and a basically conical sheet will result. This is the technique to make well fitting mantles for coifs, using only five rings expansion per ring row (as shoulders are sloped downwards), and even building real hemispherical domes for the coif's top, by successive decreasing the numbers of expansion rings per row, from six at the dome's 'pole' down to zero at the 'equator' transition to the vertical walls. But a mathematical method for precalculating proper numbers is not shown here - I concentrate on the basic technique to build a flat circular European-4in1 sheet.
Rings used for that tutorial are 1.6mm coiled on 5/16" (~8mm) mandrel, with a final AR of ~5.3, and 1.6mm * 1/4" ones (AR~4.2) for the expansions - 'active/important' rings are marked by coloring them in the photos.
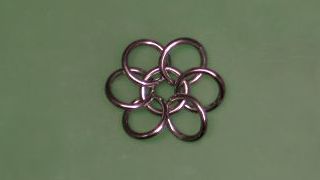
Step 1: Start with six preclosed rings, threaded on a central one, and arranged like a flower.
Step 2: 'Seam' this flower with six rings in standard European style, to begin the next ring row.
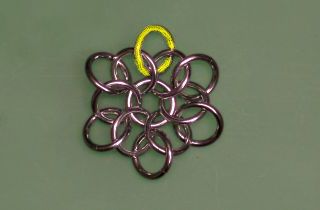
Step 3: Add six rings into the gaps between the previous set border rings, in 1-on-1 style, to get a border row with now 12 rings.
Note that this is the first time, that I used smaller rings, for doing the expansion. This choice is NOT mandatory, and expansions can also be made with the same ring size as used for the remainder of the weave. But it serves to spread loads on the weave better, and to get a more regular pattern. The advantage of using the smaller rings may not yet show at the relatively high AR of 5+, as used for this tutorial's images, but once you use ARs around or even below four, the advantage of using expansion rings with 0.5 to 1 lower AR becomes visible. Best check it out yourself.
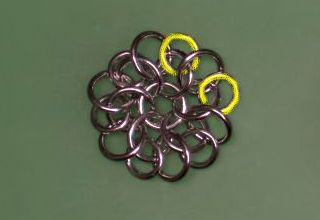
Step 4: Basically repeat Step 2, but as the border has twelve rings now, you need twelve rings to start the next ring row of the expansion.
Step 5: Again add six rings, to increase the border's ring number by six. But this time intersperse these rings only at every second gap, to spread the added rings evenly around the border. In result your border has now 18 rings.
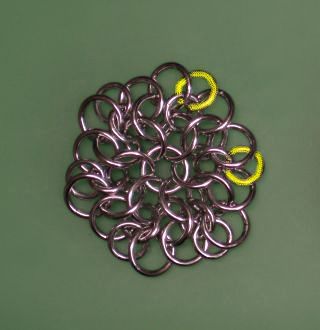
Step 6: And again, seam the border in Euro style, by connecting two neighboring rings each, to start the next ring row.
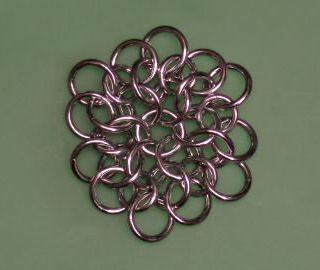
Step 7: And again, intersperse evenly a set of six expansion rings - as the border had 18 rings, and six rings have to be set, now into every third gap.
And if you didn't notice yourself, we're already deep in the 'rinse and repeat' zone, now. :)
Additional remarks:
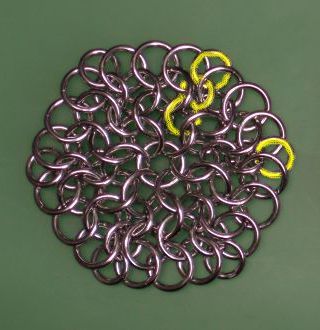
There are several options, how to place the expansion rings in relation to the ones of previous ring row. Depending on personal taste, the expansion rings can be 'stacked' onto each other, to give basically six seams, connecting six triangular Euro-4in1 sheet segments, and resulting in a basically hexagonal pattern. This method was chosen for the samples of this tutorial - note the three marked, stacked expansion rings.
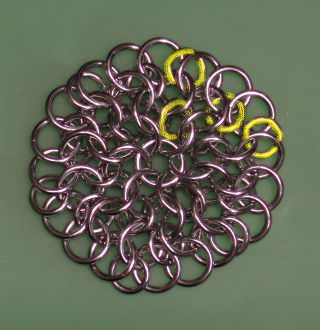
Alternatively the expansion rings of successive rows can be set as far apart from each other as possible, what usually spreads possible loads on a sheet more evenly, and results in more circular sheets. But as told, this depends on personal taste - I used both methods. And please note that especially on larger sheets with many rows some maillers spread the expansion rings with growing base ring number of a row sometimes uneven or only halfways evenly, purposely, to hide the expansions a bit better. But this method can also be used for 'fine-tuning' when tailoring e.g. coifs or other armor pieces. See here also the marked expansion rings.
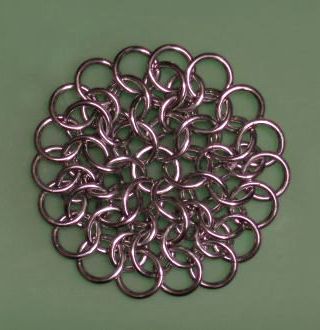
Adding of further ring rows, until the wished/needed diameter/circumference is reached, should be a straightforward affair.
Have fun :)
-ZiLi-